
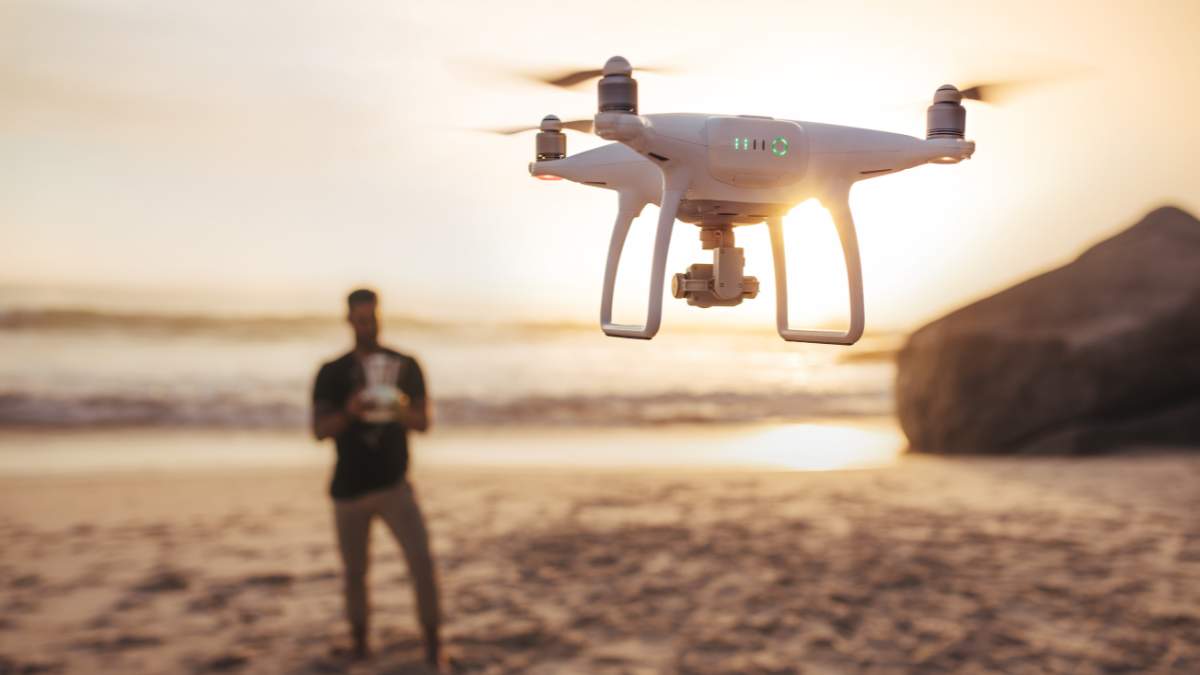
A drone with a camera
Camera drones have revolutionized the way we perceive and capture the world around us, offering a unique bird’s-eye perspective. What was once the domain of expensive film productions and required specialized aviation equipment is now becoming available to a wide range of photography enthusiasts, amateur filmmakers, travelers, and even those simply looking for a new, exciting hobby. This democratization of aviation technology has opened up unprecedented creative possibilities, allowing you to capture breathtaking landscapes, fast-paced sporting events, and family moments from a completely new, previously unavailable perspective.
Spis treści
Which drone to choose?
What to consider when choosing a drone?
The first and fundamental step before buying a drone with a camera is to precisely define the main purpose of its use. It is the application of the device that will determine which features and technical parameters will turn out to be a priority and which will be of secondary importance. Improper determination of needs can lead to unnecessary expenditure on functions that we will never use, or on the contrary – to the purchase of equipment that will turn out to be insufficient to achieve the intended goals.
Let’s consider some common scenarios:
- Hobbies and recreation: If the drone is to be used mainly for fun, learning the basics of piloting and occasionally taking photos and videos during holidays or family gatherings, ease of use, compact dimensions and a relatively low price will be crucial. In this case, advanced camera features or extreme range may not be necessary.
- Traveling and documenting adventures: For those who want to capture their journeys from the air, mobility will be a priority – a lightweight, foldable design for easy transport, a decent quality camera to create compelling footage, and a long enough flight time to explore new places freely.
- Artistic/semi-professional photography and videography: This is where image quality comes to the fore. The key will be camera parameters such as the size of the sensor, high resolution, the ability to record in RAW formats for photos, advanced manual exposure control options, effective image stabilization (preferably a 3-axis gimbal) as well as precision and stability of flight.
- Professional/Commercial Applications: When a drone is used for commercial purposes, such as technical inspections, mapping, advanced film productions, or environmental studies, the requirements become the most stringent. High reliability, long flight time, the ability to carry specialized sensors (e.g. thermal, multispectral), advanced safety systems and often resistance to more difficult weather conditions will be necessary.
A drone to start with.
The level of experience in piloting drones also plays a vital role in the decision-making process.
- Beginner: If you’re just starting out in flight, consider models that are easy to use and feature robust safety features such as obstacle avoidance sensors and automatic return to take-off (RTH). It is also worth considering drones with dedicated beginner modes, which limit the speed and sensitivity of the controls, minimizing the risk of errors. Starting with a cheaper model may be a good idea to “stress-free” master the basics of piloting before investing in more expensive equipment.
- Users with some experience/Hobbyists: Pilots who have already flown their first flights and know the basics may be looking for drones that offer better camera quality, longer battery life, longer range, and more advanced intelligent features for more creative shots.
- Professionals: Experienced operators who use drones in their professional work will choose models precisely tailored to the specifics of their tasks, often from the highest technological shelf, offering uncompromising quality and reliability.
How much does a good drone with a camera cost? A drone for beginners.
The price range of drones with a camera is very wide, and the budget we have will largely define the capabilities and quality of the equipment we can afford. It is worth remembering that, especially in the context of the quality of the camera and stabilization systems, the price often goes hand in hand with the possibilities, which is important for anyone who is starting their adventure with drones.
There are several approximate price categories:
- Budget drones (e.g. up to PLN 500-1000): In this category, you will find mainly models designed for learning to fly and basic fun. The cameras in these drones usually offer basic quality, often without advanced mechanical stabilization (they may have electronic image stabilization – EIS or none at all), which translates into less smooth and potentially shaky recordings. Flight time and range are usually limited. Examples include models such as the Extralink E88 Pro or the UGO Zephir.
- Mid-range drones (e.g. PLN 1000-3000): This is a popular segment among hobbyists, offering a good compromise between price and quality. Drones at this price are often equipped with cameras that record in 4K resolution, supported by 3-axis mechanical gimbals, which ensures smooth and stable shots. The flight time is usually in the range of 20-30 minutes, and the range is much longer than in budget models. There are also intelligent flight modes that can make it easier for drone beginners to take off. In this category you will find models such as the DJI Mini 2 SE, DJI Mini 4K or Fimi X8 Mini.
- Semi-professional/premium drones (e.g. PLN 3000-6000): Entering this price range, we can expect high-quality cameras with larger sensors (e.g. 1-inch or similar), which translates into better image quality, especially in more difficult lighting conditions. These drones offer advanced photo and video features, longer flight times, better obstacle avoidance systems, and greater overall reliability. Examples are the DJI Mini 4 Pro or the drones from the DJI Air series.
- Professional drones (over PLN 6000): This is a category for the most demanding users. These drones offer the highest possible image quality, often with the possibility of replacing cameras and lenses, specialized sensors (e.g. thermal imaging), maximum reliability, long flight time and advanced safety systems. These are work tools for professionals. Examples include the DJI Mavic 3 Pro or the DJI Inspire.
Understanding that a certain minimum level of investment is necessary to get satisfactory results is crucial, especially if the quality of your video recordings is a priority. Cheap drones, without effective stabilization, may turn out to be practically worthless for filming, providing material resembling “roller skating on cobblestones”.
The table below shows the approximate features of drones in each price category, which can make it easier to get an initial idea of the possibilities available within a specific budget.
Indicative Features of Drones in Individual Price Categories
| Price category | Typical camera parameters (resolution, sensor, stabilization) | Average Flight Time | Key Intelligent Features | Typical Application/Target Group |
|---|---|---|---|---|
| Up to PLN 1000 | HD/Full HD (less often 4K), small sensor (e.g. <1/2.3″), EIS or none, low resolution images | 10-20 min | Basic (e.g. RTH) | Learning to fly, having fun, occasional photos/videos |
| 1000 – 3000 PLN | 4K, sensor approx. 1/2.3 “- 1/1.3”, 3-axis gimbal, 12MP+ photos | 20-35 min | Tracking, QuickShots | Hobbies, travel, amateur photography/filming |
| 3000 – 6000 PLN | 4K/5K+, 1/1.3 “- 1” or larger sensor, 3-axis gimbal, RAW, advanced modes | 30-45 min | Advanced Tracking, MasterShots, Waypoints, Omnidirectional Obstacle Sensors | Advanced Hobbies, Semi-Professional Applications |
| Over PLN 6000 | 4K/5K+/8K, large sensors (e.g. 4/3″, full frame), interchangeable lenses, RAW video, specialized sensors | 30-45+ min | Full range, specialized features | Professional filming, inspection, mapping |
The Heart of the Drone: All About the Camera – What to Look For?
The camera is, without a doubt, one of the most important components of a drone if the main objective is photography or videography. Its parameters directly translate into the quality of the materials obtained.
Video and Photo Resolution: Is 4K Standard? (HD, Full HD, 4K, 5K+)
Resolution determines the number of pixels that make up an image, which directly affects its detail. Popular standards include HD (1280×720 pixels), Full HD (1920×1080 pixels), 2K (often 2560×1440 pixels) and 4K (usually 3840×2160 pixels, also called UHD). Some more advanced drones offer even higher resolutions, such as 5.4K (e.g. DJI Air 2S ) or even 8K.
Currently, 4K resolution is becoming the standard for high-quality materials, especially if we plan to further process them, e.g. cropping, without significant loss of detail. For serious film productions, 4K is the absolute minimum. However, for novice users or for applications where the highest detail is not a priority (e.g. quick social media posting), 2K or even Full HD resolution may still be sufficient to save space on the memory card and computer resources during editing.
It is worth paying attention to whether the resolution declared by the manufacturer is the native resolution, resulting directly from the capabilities of the sensor, or whether it is an interpolated (digitally enlarged) value. Native resolution will always provide better real image quality.
Frames per second (FPS): Smooth visuals and slow motion.
FPS, or Frames Per Second, is a parameter that determines how many individual images (frames) are displayed or recorded in one second of a video. This has a key impact on the perception of smooth motion and creative possibilities, such as creating a slow motion effect.
- 24/25/30 FPS: These are standard values used in film and television production. They provide a natural, “cinematic” look of the picture. 30 FPS is often the minimum value for good quality drone footage.
- 60 FPS: Recording at 60 frames per second results in a much smoother image, which is especially desirable when filming fast-paced scenes, sports, or fast-moving subjects. It also provides greater clarity of details in motion.
- 120 FPS and above: Such high frame rates are used primarily to create effective slow motion shots. The recorded footage can then be slowed down in post-production, achieving smooth and detailed slow-motion of the action.
Keep in mind that recording at higher FPS values typically requires better lighting conditions (more light) and generates larger video files, which requires more memory card space and processing power for editing.
Sensor size in the drone: The key to image quality (e.g. 1/2.3 inch, 1/1.3 inch, 1 inch).
The size of the light-sensitive sensor in a drone camera is one of the most important, if not the most important , factor determining the quality of recorded photos and videos. It often matters more than the number of megapixels itself. A larger sensor, with the same number of pixels, means larger individual pixels that are able to collect more light. This, in turn, translates into a number of benefits.
Standard sensor size designations in drones, such as 1/2.3 inch, 1/1.3 inch or 1 inch, can be misleading. The general rule is that the smaller the number in the denominator of the fraction (or the larger the number before “inch”), the larger the matrix. Thus, a 1/2.3-inch sensor is smaller than 1/1.3 inch, and this in turn is smaller than a 1-inch sensor. Even larger sensors, e.g. 4/3 inch, are found in more expensive, professional drones.
How a larger sensor affects image quality:
- Better overall image quality and more detail can attract the attention of drone beginners. Larger sensors are able to record more information about the scene.
- Improved low-light performance: Thanks to larger pixels that collect light more efficiently, drones with larger sensors perform much better after dark or in underexposed places, generating a brighter image with fewer artifacts.
- Less noise at higher ISO sensitivities is a feature worth paying attention to when choosing the right drone to start with. The ability to collect more light means that you don’t have to bump up the ISO as aggressively, resulting in a cleaner image with less unwanted grain (noise).
- Greater dynamic range: Larger sensors are better able to capture high-contrast scenes (e.g. bright skies and dark areas on the ground), while preserving more detail in both highlights and shadows.
- Potentially shallower depth of field: Although this effect is limited with small drone sensors compared to interchangeable lens cameras, a larger sensor can produce a slightly more “plastic” image with more subtle background blur.
For example, the popular DJI Mini 2 is equipped with a 1/2.3 “CMOS sensor, while the DJI Mini 3 Pro has a larger 1/1.3” CMOS sensor. On the other hand, models such as the DJI Air 2S boast a 1-inch CMOS sensor, and the flagship DJI Mavic 3 uses an even larger 4/3 CMOS sensor. Choosing a drone with a larger sensor is especially important for those who want the highest image quality and flexibility in post-production, especially if they plan to photograph or film in varied and difficult lighting conditions.
ISO sensitivity in drones: How to deal with difficult lighting conditions?
ISO sensitivity is a parameter that determines the sensitivity of a camera’s sensor to light. In digital photography, as in traditional film photography, a higher ISO means greater sensitivity to light, allowing you to get a correctly exposed image in low-light conditions without the need for very slow shutter speeds or very fast lenses.
The basic rule of thumb for ISO is that you should aim to use the lowest possible ISO value, as this ensures the best image quality with minimal noise (grain). Increasing ISO sensitivity is inevitable when the amount of light available is low, but this comes at the expense of increased noise and a potential loss of detail and tonal dynamics of the image.
The ISO range of drone cameras varies depending on the model. For professional use, it is often recommended to work in the range of 100-800 ISO to maintain high quality. However, many popular drones offer a wider range, such as 100 to 3200 or even 6400 ISO for video and photos.
Note that the usable ISO range is strongly related to the size of the camera’s sensor. Drones with larger sensors (e.g. 1-inch) generally cope much better with higher ISO values, generating less noise and maintaining better image quality compared to models with smaller sensors. Therefore, if you plan to often film or photograph in difficult lighting conditions (e.g. at dusk, indoors), choosing a drone with a larger sensor and good performance at higher ISO will be crucial.
Image stabilization: Mechanical gimbal (2- and 3-axis) vs. EIS. What to choose for smooth shots?
Image stabilization is absolutely crucial for smooth, professional-looking and enjoyable video shots, especially when the footage is captured from a moving and vibrating platform such as a drone. Without effective stabilization, recordings will be shaky, chaotic and simply unwatchable. Drones mainly use two types of stabilization systems: mechanical gimbals and electronic image stabilization (EIS).
- Mechanical Gimbal: It is an advanced camera suspension system that uses high-precision brushless motors and gyroscope sensors to physically compensate for the drone’s movements and vibrations in real-time.
- Types of Gimbals:
- 2-Axis Gimbal: It stabilizes the camera in two axes – pitch (up-down movement) and roll (sideways movement).
- 3-Axis Gimbal: In addition, it stabilizes the camera in the rotation axis (yaw, left-right movement). This is now the standard for high-quality drones as it provides the most comprehensive and effective stabilization, eliminating shake in all three planes.
- Advantages of mechanical gimbal: It provides the highest quality of stabilization, especially in the case of sudden drone movements or stronger gusts of wind. Stabilization is optical, which means no loss of image quality and no need for digital cropping.
- Disadvantages of a mechanical gimbal: This is a more expensive solution, adds some weight and complexity to the drone’s design, and as a mechanical component, it is potentially more susceptible to damage in the event of a collision.
- Types of Gimbals:
- Electronic Image Stabilization (EIS): It is a software technique that analyzes successive frames of the video image and digitally compensates for the detected vibrations by moving, rotating or slightly distorting the image. To have a “margin” for these adjustments, EIS often involves a slight cropping of the camera’s original field of view.
- Advantages of EIS: It is a cheaper solution to implement, does not add weight or moving parts, which makes the drone lighter and potentially less susceptible to certain types of mechanical damage, which is worth considering when choosing a drone.
- Disadvantages of EIS: The effectiveness of EIS is typically lower than that of a mechanical gimbal, especially at higher vibrations. It can introduce some artifacts to the image (e.g. the “jello effect”) or unnatural “floating” of the image. Cropping the frame means some loss of field of view and potentially quality, especially if the original image is not the highest resolution.
- Hybrid stabilization: Some drones may combine a simpler gimbal (e.g., 1-axis or 2-axis) with additional electronic image stabilization in an attempt to strike a trade-off between quality and cost.
For those serious about filming with a drone, a 3-axis mechanical gimbal is by far the preferred solution and standard in mid-priced drones and above. The difference in the quality of stabilisation compared to the EIS is usually very pronounced. Choosing between these systems is not only a matter of smoothness of shots, but also a compromise between image quality, the cost of the drone and its potential durability.
Recording formats: JPG, RAW, DNG – what to choose for the best quality and flexibility?
The format in which the drone saves photos is of great importance for their subsequent processing and final quality. The most common formats are JPG and various variants of the RAW format (e.g. DNG).
- JPG: It is a standard, commonly used image file format. JPG photos are compressed (usually lossy, which means losing some information about the image to reduce file size), processed already in the drone (white balance, saturation, contrast are “burned in” in the file) and ready to be used or shared immediately. JPG files take up relatively little space. The main disadvantage is much less flexibility during post-production – attempts at deeper editing (e.g. changing exposure, recovering details from shadows or highlights) quickly lead to a visible degradation of image quality.
- RAW (e.g. DNG – Digital Negative): The RAW format, often referred to as the “digital negative,” stores much more raw data directly from the camera’s sensor, with no lossy compression and no pre-processing by the drone’s image processor.
- Advantages of the RAW format:
- Maximum image quality: Retain all the information recorded by the sensor.
- Huge flexibility in post-production: RAW files offer a much wider dynamic range and a higher color bit depth, which allows for precise correction of exposure (brightening, darkening), white balance, contrast, saturation, and above all, effective recovery of details from overexposed (bright) and underexposed (dark) areas of the photo, without significant loss of quality. This is invaluable in the difficult lighting conditions that drones often deal with (e.g. contrasting scenes with bright skies and dark land).
- Non-destructive editing: Changes you make while editing a RAW file are saved as instructions, and the original data remains intact, allowing you to revisit your edits multiple times and experiment with different settings.
- Disadvantages of the RAW format:
- Larger file size: RAW files take up much more space on your memory card and hard drive than JPG files.
- Need for machining: RAW images require specialized software to “develop” (e.g. Adobe Lightroom, Capture One, Affinity Photo, free darktable) and spend time in post-production to get the final image. They are not suitable for direct sharing.
- Advantages of the RAW format:
If you prioritize the highest possible image quality and complete control over your creative process, it is highly recommended to shoot in RAW ( or RAW+JPG mode, which saves both formats at the same time). Although it requires additional work, the benefits in terms of quality and flexibility cannot be overestimated, especially when we want to get the most out of our drone’s camera.
HDR in drones: More detail in highlights and shadows for spectacular shots.
HDR, or High Dynamic Range, is a photography and filming technique that aims to more faithfully reproduce scenes with very high contrast – i.e. those where there are both very bright and very dark areas (e.g. a landscape with a bright sky and deep shadows on the ground, an interior with bright windows). Standard cameras often have a problem with the correct exposure of such tonally diverse parts of the scene at the same time – either the sky will be overexposed (white, without details), or the shadows will be too dark (black, without details).
Drones can implement HDR in several ways:
- Auto HDR mode (often for JPG/HEIF photos): The drone takes a series of photos with different exposures (one underexposed, one correctly exposed, one overexposed) and automatically combines them into one image with an extended dynamic range. This is a quick and convenient solution, but it gives you less control over the final effect. Some drones offer HDR video recording (e.g. 4K HDR), which can be accomplished through special image processing from the sensor (e.g. HDR PQ – Perceptual Quantization technology).
- Auto Exposure Bracketing (AEB): In this mode, the drone takes a series of photos (usually 3 or 5) of the same scene with different exposure levels (e.g. -2EV, 0EV, +2EV), saving them as separate files (preferably in RAW format). The user can then combine these photos in specialized software (e.g. Adobe Lightroom, Photomatix Pro) into a single HDR image, having full control over the process and the final appearance. This method usually gives the best results in terms of quality and quantity of preserved parts.
Advantages of using HDR in drone photography and videography:
- Better capture of detail in the brightest parts of the image (e.g. clouds, sun) and in the darkest shadows.
- A more natural and tonally balanced look for high-contrast scenes, closer to how the human eye perceives reality.
- Create more dramatic and visually impactful shots, especially landscapes.
The tables below summarize the key aspects involved in choosing a drone camera.
Comparing Sensor Sizes in Popular Drones
| Sensor size | Examples of drone models | Key Benefits | Indicative target group |
|---|---|---|---|
| 1/2.3 inch | DJI Mini 2, DJI Mini SE, older budget models | Lower cost, smaller drone size | Beginners, hobbyists on a budget, recreational uses |
| 1/1.3 inch | DJI Mini 3 Pro, DJI Mini 4 Pro, DJI Flip | Good compromise between quality and size/weight, better low-light performance and greater dynamic range than 1/2.3″ | Advanced hobbyists, travel enthusiasts, content creators, as well as drone beginners can find a lot of inspiration in the available models. |
| 1 inch | DJI Air 2S, DJI Mavic 2 Pro, Autel EVO II Pro | Very good image quality, great low-light performance, high dynamic range, good detail | Semi-professionals, demanding hobbyists, commercial photography/filming on a smaller scale |
| 4/3 inch | DJI Mavic 3 (main camera), DJI Inspire (with some cameras) | Excellent image quality, comparable to some system cameras, best low-light performance and dynamic range | Professionals, advanced film and photo productions |
Image Stabilization Comparison – Mechanical Gimbal vs. EIS
| Feature | Mechanical Gimbal (3-Axis) | Electronic Image Stabilization (EIS) |
|---|---|---|
| Quality of stabilization | Ultra-high, smooth and stable shots | Variable, often lower, possibility of artifacts |
| Impact on field of view/image quality | No cropping, no quality loss | Usually crops the frame (reduces the field of view), possible slight loss of quality |
| Implementation cost | Taller | Lower |
| Weight and complexity of the structure | Adds weight and complexity | Minimal impact on weight and complexity |
| Susceptibility to mechanical damage | Higher (moving parts) | Lower (software solution) |
| Recommendation for filming | Definitely preferred for high quality | Acceptable for basic applications, budget models |
Aerial Performance: Key Flight Parameters for a Camera Drone
In addition to the quality of the camera, the drone’s flight parameters are equally important, as they determine its operational capabilities, safety and comfort of use.
Drone range: How far and stable will your drone fly? (Wi-Fi, OcuSync, Lightbridge)
The range of the drone determines the maximum distance it can move away from the controller while maintaining a stable connection for control and live video transmission (FPV – First Person View). This is a key parameter, especially if you plan to film vast landscapes or objects that are at a considerable distance.
Signal transmission technology is fundamental here:
- Wi-Fi: This is the simplest and cheapest technology, mainly used in lower-end consumer drones. The Wi-Fi transmission range is usually limited to a few hundred meters, and in the case of more advanced “enhanced Wi-Fi” systems, it can reach about 2 kilometers. However, the Wi-Fi signal is more susceptible to interference, especially in an urban environment with a large number of other wireless networks or in an obstacle field. The quality of the FPV image transmitted is usually 720p.
- Lightbridge (e.g. Lightbridge 2): This is an older, but still used by DJI, digital transmission technology, found in some of the more advanced models. It offers better range (up to 5 km with Lightbridge 2) and greater signal stability compared to Wi-Fi. It enables image transmission in resolution up to 1080p.
- OcuSync (different versions, e.g. OcuSync 2.0, O3, O3+, O4): It is the most modern and advanced transmission technology developed by DJI. It offers by far the best parameters that may be important for drone beginners.
- Range: Depending on the version and conditions, the range can range from 6 km (e.g. DJI Mini 4K ) to 10 km (e.g. DJI Mini 4 Pro , DJI Avata 2 ) and even more, especially in the FCC standard.
- Stability and resistance to interference: OcuSync uses advanced algorithms and often automatic switching between frequency bands (2.4 GHz and 5.8 GHz) to ensure a stable connection even in challenging environments.
- Low latency is important, especially for a lightweight and compact drone. This is crucial for precise control and smooth FPV viewing. OcuSync is characterized by very low latency.
- High Transmission Quality: Typically 1080p, which provides a clear and detailed live view.
It is worth noting that manufacturers often specify the maximum range achievable under ideal conditions, without obstacles or interference, and distinguish between FCC (used in North America) and CE (used in Europe) standards. The range in the CE standard is usually much less than that of the FCC. The real range of the flight may be additionally limited by factors such as terrain obstacles (buildings, trees, hills), strong electromagnetic interference (e.g. near high-voltage lines, mobile phone base stations) and adverse weather conditions. For most users, the optimal range is 2-5 kilometers.
Flight time on a single battery: Realities vs. manufacturers’ declarations.
The maximum flight time on a single battery charge is one of the most important practical parameters, directly affecting the comfort of using the drone and the ability to take longer, more complex shots. Manufacturers provide flight times in the specifications, which often range from about 20 minutes for cheaper models, through 30-35 minutes for popular mid-range drones (e.g. DJI Mini 4K – 31 min , DJI Mini 3 – 38 min , DJI Mini 4 Pro – 34 min ), to over 40 minutes in some advanced designs (e.g. Autel EVO Lite+ – 40 min ).
However, it should be remembered that the declared flight times are usually achieved in ideal laboratory conditions – at a constant, optimal speed, without wind, in moderate temperatures, and often without performing intensive maneuvers or recording in the highest quality. In real conditions, the flight time is almost always shorter by a few or even several minutes. Factors that reduce the real flight time are primarily:
- Pilot style: Aggressive, dynamic flying consumes more energy than calm, smooth movements.
- Wind Strength: Flying against the wind or in gusty winds requires more work from the drone’s engines, which significantly accelerates battery consumption, so novice drone users should pay attention to several key aspects.
- Ambient Temperature: Low temperatures (close to 0°C and below) negatively affect the performance of lithium-polymer batteries, reducing their lifespan and available flight time.
- Use advanced features: Heavy use of obstacle avoidance systems, high-resolution recording, and the use of smart modes can also slightly increase power consumption.
Therefore, when choosing a drone, it is worth aiming for models that offer a declared flight time of at least 20-30 minutes to have some reserve for real conditions. Proper energy management is also key: planning flights taking into account the conditions, avoiding flying until the battery is completely discharged (it is recommended to land when the charge level drops to about 15-20%) and, most importantly, having a few spare, fully charged batteries.
Top Speed and Flight Ceiling: Is More Better?
The maximum flight speed of a drone can be important in some applications, for example, when filming fast-moving objects (cars, athletes) or when you want to quickly move to a distant framing location. In the specifications we can find different values, for example, the DJI Mini 2 SE reaches up to 16 m/s (about 57 km/h) in Sport mode, and specialized FPV drones, such as DJI FPV, can develop speeds of 27 m/s (Sport mode) and even 39 m/s (Manual mode), which exceeds 140 km/h. Many drones offer different flight modes (e.g., Cine, Normal, Sport) that limit the maximum speed and sensitivity of the sticks, allowing for smoother and more stable shots (Cine mode) or for full dynamics (Sport mode).
Max Service Ceiling Above Sea Level is a parameter that determines the maximum altitude at which the drone is able to operate. These values can reach 4000 m above sea level (e.g. DJI Mini 2 SE ) or even 6000 m above sea level (e.g. DJI FPV ). This is important mainly for people planning flights in high mountains.
However, it is necessary to categorically distinguish between the maximum flight ceiling above sea level and the maximum permissible flight altitude above ground (AGL – Above Ground Level). In accordance with the regulations in force in Poland and the European Union, in the Open category, the maximum flight height of the drone is 120 meters from the nearest point of the earth’s surface. Exceeding this height is allowed only in special cases and requires appropriate permits.
Wind resistance: How to interpret specifications and fly safely?
Wind resistance is an extremely important parameter that directly affects the stability of the drone’s flight, the quality of the recorded materials (especially video) and, most importantly, the safety of operations. Manufacturers usually list the maximum wind speed at which the drone is able to maintain a stable position and be safely controlled. This value is often expressed in meters per second (m/s) or as a level on the Beaufort scale.
For example, the DJI Mini 2 SE and DJI Mini 4K declare wind resistance of up to 10.7 m/s, which corresponds to a degree 5 on the Beaufort scale. The DJI Mini 2 is also resistant to 5 Beaufort winds, making it an ideal choice for those starting out with drones.
To better understand these values, it is worth familiarizing yourself with the Beaufort scale, which describes the strength of the wind based on the observation of its impact on the environment :
- 0 Bft (0-0.2 m/s): Quiet. The smoke rises vertically.
- 1 Bft (0.3-1.5 m/s): A light breeze. The smoke deflects slightly.
- 2 Bft (1.6-3.3 m/s): Light wind. The leaves rustle, you can feel the wind on your face.
- 3 Bft (3.4-5.4 m/s): Gentle wind. Leaves and small twigs in constant motion, light flags flutter.
- 4 Bft (5.5-7.9 m/s): Moderate wind. Dust and papers rise from the ground, branches move. Flying most drones is still possible, but it may require more attention.
- 5 Bft (8.0-10.7 m/s): Quite a strong wind. Small deciduous trees begin to sway, crested trees form in inland waters. This is often the limit value for many popular consumer drones. The drone uses much more energy to maintain its position, and the quality of the recordings may deteriorate.
- 6 Bft (10.8-13.8 m/s): Strong wind. Large branches move, you can hear the wind whistling in the wires. Flying most consumer drones is already very risky or impossible.
- Over 6 bft: Conditions are becoming dangerous for drone operations.
Keep in mind that lighter drones, especially those weighing less than 250 grams, are inherently more susceptible to gusts of wind, even if their specifications declare a certain level of resistance. In such conditions, you can expect higher vibrations and difficulty in maintaining a stable flight.
Before each flight, you should check the weather forecast, with particular emphasis on wind speed and gustiness. Avoid flying in winds beyond the capabilities of the aircraft or when conditions are unstable. When flying in windy conditions, you need to constantly monitor the behavior of the drone and the battery level, which will wear out faster. Safety should always be a priority.
Comparison of Drone Image Transmission Technology
| Technology | Typical Range (CE, Open Area) | Signal Stability/Interference Immunity | Delay (indicative) | Quality of the transmitted image | Examples of drone models |
|---|---|---|---|---|---|
| Wi-Fi Standard | Up to several hundred meters | Low/Medium | Variable, often higher | Typically 720p | Older budget models, toy drones |
| Wi-Fi Enhanced | Up to approx. 2 km | Average | Variables | Typically 720p | DJI Spark, DJI Mavic Air (first generation) |
| Lightbridge 2 | Up to approx. 3.5 – 5 km | Endorsement | Average | Up to 1080p | DJI Phantom 4 Pro, DJI Inspire 2 |
| OcuSync 2.0 | Up to approx. 6 km | High | Low (approx. 120-130ms) | 1080p | DJI Mavic 2 Pro/Zoom, DJI Mini 2, DJI Air 2 |
| OcuSync 3.0 (O3) | Up to approx. 8 km | Very high | Very Low (approx. 28ms for FPV) | 1080p | DJI FPV, DJI Mavic 3 (some versions), DJI Avata |
| OcuSync 3.0+ (O3+) | Up to approx. 8-10 km | Very high | Very low | 1080p | DJI Mini 3 Pro, DJI Mavic 3 Classic/Cine, DJI Air 2S |
| OcuSync 4.0 (O4) | Up to approx. 10 km | Highest | Lowest | 1080p | DJI Mini 4 Pro, DJI Air 3, DJI Flip |
Smart Drone Features: Your Creative Assistant in the Air
Modern drones are much more than just flying platforms with cameras. These are high-tech devices, equipped with a number of intelligent flight functions that automate certain maneuvers, facilitate the creation of complex and effective shots, and assist the pilot, making flying more intuitive and creative. While these features are extremely helpful, they are no substitute for piloting skills and understanding the basics of composition or safety. These are tools that, in the hands of a conscious operator, can significantly expand creative possibilities.
Object tracking modes: ActiveTrack, Follow Me and more – the drone will follow you.
One of the most popular smart features is automatic object tracking. In DJI drones, this feature is called ActiveTrack, but similar solutions (often generally called Follow Me) are also offered by other manufacturers. When you point to a moving object on the controller’s screen – whether it’s a person, a cyclist, a car or a boat – the drone automatically recognises it and tries to keep it in the frame by following it and adjusting its position and camera orientation.
Tracking modes are extremely useful for filming sports activities, fast-paced scenes where it would be difficult to manually keep the subject in the frame, as well as for creating striking third-person shots where the drone acts as an autonomous camera operator. The effectiveness of these modes depends on many factors, such as lighting conditions (good lighting and contrast of the object in relation to the background are crucial), the speed and predictability of the movement of the tracked object, as well as the sophistication of image recognition algorithms and obstacle avoidance systems in a given drone model.
Automatic route planning: Waypoints for precise and repeatable flights.
The Waypoints function allows you to precisely plan the autonomous flight of the drone. On the map in the control application, the user defines a series of points (waypoints) through which the drone is to fly. For each point, additional parameters can often be specified, such as flight altitude, speed, drone orientation, camera actions (e.g. start/end recording, take a photo, change the angle of the gimbal). After launching the mission, the drone autonomously carries out the planned route.
Waypoints is invaluable for creating complex, fluid, and repetitive footage such as long runs, flyovers of vast terrain, and precise flights of architectural objects. It also enables repetitive missions, which is useful for applications such as construction progress monitoring, inspections, and orthomapping.
Striking one-click shots: QuickShots and MasterShots for cinematic effects.
Manufacturers like DJI equip their drones with sets of predefined, automated flight maneuvers that allow you to quickly and easily create short but impactful video clips, even without advanced piloting skills.
- QuickShots: It is a set of short, dynamic sequences where the drone performs a specific maneuver around a specified object or moving away from it, while recording a video. Popular QuickShots modes include:
- Drones like the Ryze Tello are perfect for beginners. The drone moves away from the object while ascending.
- Rocket: The drone rises vertically above the object, with the camera pointing downwards.
- Circle: The drone circles the object.
- Helix: The drone spirals around the object.
- Boomerang: The drone moves away from the object along an elliptical route and then returns.
- MasterShots: This is an even more advanced feature, available on some newer DJI models. After indicating the object, the drone automatically performs a series of a dozen or so different, professional-looking flight maneuvers (inspired by film techniques), and then the application can automatically edit a ready-made, dynamic video clip with background music.
These features are ideal for quickly creating visually appealing content, such as for social media, or as a fun addition to longer video productions.
Flight around the object: Point of Interest (Orbit) for dynamic 360-degree frames.
Point of Interest (PoI) mode, often also called Orbit, allows the drone to automatically circle a target, stationary while keeping it in the center of the frame. The user can usually control the lap radius, flight altitude and speed. This is a great way to effectively present buildings, monuments, landmarks or other points of interest, obtaining a smooth 360-degree shot.
Hyperlapse and other creative modes: Capture the passage of time from the air.
- Hyperlapse: It is a technique of creating timelapse videos, but with additional, smooth movement of the camera (drone) in space. Drones offer various Hyperlapse sub-modes, such as:
- Free: The remote control manually controls the drone when taking time-lapse photos.
- Circle: The drone automatically circles the indicated object, creating a hyperlapse, which allows you to record interesting shots.
- Course Lock: The drone flies in a set direction, and the pilot can rotate the camera freely.
- Waypoint: The drone flies between the defined points, creating a hyperlapse on the planned route.
- Other Creative Modes: Many drones also offer other features, such as automatic creation of panoramic photos (composed of multiple individual shots) can be useful in the DJI Fly app for better visual effects. , or special Cine flight modes that slow down the drone’s response to stick movements, allowing for smoother and more cinematic shots.
The development of these smart features goes hand in hand with increasingly sophisticated obstacle avoidance systems, making their use safer. Nevertheless, the pilot must always be aware of the limitations of these systems and remain alert, especially in complex environments.
Flight Safety: Technologies Watching Over Your Drone
Safety during unmanned aerial vehicle operations is an absolute priority. Drone manufacturers are aware of this, equipping their devices with increasingly advanced systems that are designed to assist the pilot, minimize the risk of collision and ensure the safe return of the drone in emergency situations.
Obstacle avoidance systems: How do they work and how effective are they? (Vision Sensors, Infrared, ToF, Ultrasonic, APAS)
Obstacle avoidance systems play a key role in preventing a drone from colliding with objects in its path. They work on the basis of various types of sensors that monitor the drone’s surroundings and transmit information to its control system.
- Types of sensors and how they work:
- Vision Sensors (Cameras): They use one (mono) or more commonly two (stereo) cameras to analyze the image of the environment and identify obstacles based on visual data processing. Stereo systems allow for better depth perception and distance judgment. Their effectiveness depends on good lighting conditions and whether the obstacles have a clear texture and contrast with the background.
- Infrared (Infrared/IR) sensors: They emit infrared light invisible to the human eye and measure its reflection from objects to detect their presence and distance. They also operate in the dark, but their range may be limited and some surfaces (e.g. very dark or infrared absorbing) may be difficult for them to detect.
- ToF (Time-of-Flight) sensors: These are advanced sensors, often using laser or infrared light, that work by measuring the time it takes for a light pulse to reach an obstacle and return to the sensor. This allows for a very precise determination of the distance to the obstacle. ToF sensors are effective in a variety of lighting conditions.
- Ultrasonic Sensors (Sonar): They work on the principle of echo sounder – they emit high-frequency sound waves and analyze the time and characteristics of the reflected echo. They are relatively cheap and perform well at detecting obstacles over short distances (e.g. during landing), regardless of lighting conditions. However, they can be disturbed by strong ambient noise or materials that strongly absorb sound.
- LiDAR (Light Detection and Ranging): This is the most advanced technology, using laser scanning to create precise, three-dimensional maps of the environment in real time. LiDAR systems offer very high accuracy and range, but they are expensive and mainly used in professional, expensive drones.
- Directivity of obstacle avoidance systems: The effectiveness of the system depends not only on the type of sensors, but also on their number and location on the drone. Simpler models may have sensors only at the front and/or bottom (e.g. for landing assistance). More advanced drones, such as the DJI Mini 4 Pro, offer omnidirectional obstacle detection – front, rear, sides, as well as top and bottom, for much more complete protection.
- APAS (Advanced Pilot Assistance Systems): It is an advanced remote control assistance system, developed by DJI. Unlike simpler systems that only stop the drone or inform the pilot when it detects an obstacle, APAS can analyze its surroundings and automatically plan an alternate flight route to avoid the obstacle while continuing in its original direction of flight (if possible).
However, it should be remembered that obstacle avoidance systems, even the most advanced ones, have their limitations. They may have difficulty detecting very small or thin objects (e.g. single branches, power lines, meshes), transparent objects (e.g. windows, water surface) or objects that are moving very fast. Their effectiveness can also be reduced in difficult weather conditions (e.g. dense fog, heavy rain) or in very low light (in the case of systems based on video cameras). Therefore, the pilot always has the ultimate responsibility for a safe flight and should not rely solely on automatic systems.
Automatic return to take-off point (RTH): Guaranteed safety in critical situations.
The automatic return to take-off (RTH) function is one of the key safety systems in modern drones. Its task is to automatically bring the drone to the remembered (usually at take-off) starting point.
The RTH function is activated in several situations, which is one of the basic functions of modern drones.
- Manually by remote control: The operator can initiate the return of the aircraft at any time by pressing the corresponding button on the controller or in the app.
- Automatically when Low Battery RTH: When the aircraft system detects that the battery power level is critically low and may not be sufficient to safely continue flight, it automatically initiates a return.
- Automatically when signal loss with controller (Failsafe RTH): If the drone loses connection to the controller for a certain period of time, the RTH system will also be activated to prevent the drone from flyaway.
For the RTH function to work correctly and safely, it is crucial that the drone has a correctly recorded take-off position (this requires “catching” the GPS signal before take-off) and that the pilot sets the appropriate, safe return altitude. This height should be greater than the highest obstacle in the area on the drone’s potential return route. More modern RTH systems can also use built-in obstacle avoidance sensors to correct the return route and avoid encountered objects.
Positioning Systems: The role of GPS, GLONASS, Galileo and BeiDou for stable flight.
Precise and reliable positioning of the drone in space is the foundation for its stable flight, precise hovering in place, as well as for the correct operation of many key functions, such as RTH, Waypoints, and object tracking modes. Drones use global navigation satellite systems (GNSS) for this purpose.
The most common GNSS systems are:
- GPS (Global Positioning System): The American system, the longest existing and the most widespread.
- GLONASS (Globalnaya navigatsionnaya Sputnikovaya sistema): The Russian equivalent of the GPS system.
- Galileo: A European satellite navigation system, characterized by high precision and reliability, designed for civilian use.
- BeiDou (BDS): Chinese satellite navigation system.
Modern drones are usually equipped with receivers capable of simultaneously using signals from multiple GNSS systems (e.g. GPS + GLONASS + Galileo). Such redundancy and synergy brings a number of benefits:
- Increased number of visible satellites: The drone has access to more satellites at any given time, which is especially important in difficult conditions, such as in narrow city streets with tall buildings, in valleys or near dense forests where visibility of the sky may be limited.
- Faster fixing: With more signals available, the drone determines its exact position faster and more confidently after launch.
- Improved positioning accuracy and reliability: Using multiple systems simultaneously allows for mutual correction and averaging of data, leading to more precise position determination and greater immunity to temporary signal interference from a single system.
The synergy of multiple GNSS systems directly translates into the reliability of key safety functions such as RTH and the precision of intelligent functions that rely on the precise location of the drone.
Design, Weight and Mobility: Practical Aspects of Drone Use
In addition to advanced camera and flight technologies, it is also worth paying attention to its design, weight and overall mobility when choosing a drone. These aspects have a direct impact on the comfort of use, ease of transport and, what is extremely important, on the applicable legal regulations.
Drone weight vs. regulations and comfort of transport. The magic limit of 250 grams.
The take-off weight of the drone (MTOM – Maximum Take-Off Mass) is one of the key parameters that determines both the legal regulations regarding its use and the overall convenience of transport, especially in the case of a lightweight drone. Of particular importance, especially in the context of European Union regulations, is the so-called “magic limit” of 250 grams.
- Drones under 250 grams (C0 class or 250g “legacy” <drones):
- Softer regulations: In the Open (A1) category of the European Union, drones with a take-off weight of less than 250 grams enjoy some facilitation. They can, with caution, fly closer to people (although there is still a ban on flying over gatherings of people).
- Reduced training requirements: Usually, to operate such drones in the A1 category, it is enough to complete a free online training and pass a test (the so-called A1/A3 competence) available on the drony.gov.pl platform.
- Operator registration: However, it should be remembered that if a drone, even weighing less than 250g, is equipped with a camera or other sensor capable of collecting personal data (and most drones with a camera have such a sensor), the UAV system operator (i.e. the owner/user of the drone) still needs to register on the CAA website. The only exception may be drones that meet the criteria of the Toy Directive 2009/48/EC.
- Mobility and comfort: The low weight and often compact dimensions make these drones extremely easy to transport. They can easily fit into a backpack or even a larger pocket, which makes them an ideal choice for travelers and people who value mobility. Popular examples are the DJI Mini series (e.g. Mini 2 SE, Mini 3, Mini 4 Pro), DJI Neo or Fimi X8 Mini.
- Potential trade-offs: Traditionally, drones in this weight category have had to make some technological compromises (e.g. smaller camera sensors, shorter flight time, lower wind resistance) compared to their heavier counterparts. However, technological advances are so dynamic that modern models under 250g, such as the DJI Mini 4 Pro, already offer very advanced features, including high-quality 4K cameras, 3-axis gimbals, obstacle avoidance systems, and satisfactory flight time. This legislative limit of 250g has become a strong stimulus for manufacturers to miniaturize and pack as many advanced technologies as possible into lightweight construction.
- Drones over 250 grams: They are subject to stricter regulations in individual subcategories of the Open category (e.g. A2, A3), which may involve the need for additional training and exams, and greater restrictions on the places where you can fly. On the other hand, more weight often goes hand in hand with better flight parameters (e.g. greater stability in windy conditions), more capacious batteries (longer flight time) and the possibility of using larger and more advanced camera sensors.
Foldable design: Compact and convenient for travel.
Many modern drones, both lighter and heavier, have foldable arms. This design feature significantly reduces the dimensions of the device when folded, which makes it easier to transport and store. A drone with foldable arms takes up much less space in a bag or backpack, which is an invaluable advantage for people who often travel with their equipment or simply value order and minimizing the space occupied by gadgets. The foldable design has become almost a standard in consumer drones, responding to the needs of users who want to have their drone always at hand.
Materials and resistance to damage: What to look out for?
The quality of the drone and the materials used to build it have a direct impact on its durability and resistance to possible damage that can happen, especially to novice pilots (minor collisions, harder landings). Manufacturers use different materials, such as:
- Plastics (e.g. ABS): Lightweight and relatively durable, often found in budget and mid-range models.
- Glass fiber reinforced nylon: It offers better impact resistance than standard ABS.
- Carbon Fiber: A very light and at the same time extremely durable material, used in more expensive drones, especially those designed for sports flights (FPV) or professional applications, where low weight and high structural rigidity are important.
- Aluminum or magnesium alloys: Sometimes used to build a frame or key components, providing good rigidity and heat dissipation.
It is worth choosing models from reputable manufacturers who pay attention to the quality of assembly and the components used. Some drones, such as the DJI Avata, have integrated propeller guards that provide additional protection in the event of contact with obstacles, which is especially useful when flying in tight spaces or for novice users.
Law and Drones: What You Need to Know When Flying in Poland and the EU (Updated 2025)
Owning and using a drone with a camera is not only associated with the pleasure of filming and photographing from the air, but also with responsibility and the need to comply with applicable legal regulations. Knowledge of these regulations is an absolute obligation of every drone operator and the key to the safe and legal use of airspace. It is worth noting that since December 31, 2020, harmonized regulations on drones, introduced by the European Commission’s regulations, have been in force throughout the European Union, including Poland.
Drone operator registration: When and where to register? (CAA, drony.gov.pl).
One of the basic obligations is to register as an unmanned aircraft system operator (UAS). In Poland, registration is made on a special online platform run by the Civil Aviation Authority (CAA) at drony.gov.pl.
Who is obliged to register an operator?
- Drone operators with a maximum take-off weight (MTOM) of 250 grams or more.
- There are more and more drone operators weighing up to 1000 grams, such as the DJI Ryze Tello model, on the market. less than 250 grams if they are equipped with a camera or any other sensor capable of collecting personal data. An exception to this rule are drones that meet the criteria of the EU Toy Directive (2009/48/EC) – such drones, even with a camera, may not require operator registration if they are clearly marked as toys and intended for children under 14 years of age. In practice, however, most popular drones with a camera, even ultralight ones (below 250g), will be subject to the obligation to register the operator due to the presence of a camera.
- Operators flying in the Special category, regardless of the weight of the drone.
After successful registration, the operator receives a unique, individual registration number (e.g. POLxxxxxxxxxxxxx), which should be permanently and legibly placed on each drone owned that is subject to the registration obligation. It is worth noting that a natural person registering as an operator must be at least 14 years old (in Poland).
Drone flight categories: Open (A1, A2, A3), Special, Certified – what do they mean?
EU rules divide UAV operations into three main categories, depending on the level of risk associated with the flight :
- OPEN category: Includes flights with the lowest level of risk. It is characterized by the fact that it does not require obtaining special permits from the Civil Aviation Authority before each flight, which is beneficial for operators of light drones. Flights in this category must take place within the pilot’s line of sight (VLOS – Visual Line of Sight) or with the help of an observer, the drone must not weigh more than 25 kg, and the maximum flight altitude is 120 meters above the nearest point of the earth’s surface (AGL – Above Ground Level). The Open category is divided into three subcategories, differing in requirements depending on the weight of the drone and the proximity of the flight to bystanders:
- Subcategory A1: Designed for the lightest drones – class C0 (weighing less than 250g) and class C1 (weighing up to 900g). In this subcategory, with special caution, it is permissible to fly over individual bystanders (who are not part of the operation and are not aware of the flight), but only in the case of C0 class drones. For C1 class drones, the flight over bystanders should be incidental and as short as possible. It is absolutely forbidden to fly into gatherings of people. To legally fly in this subcategory, it is required to complete free online training and pass a test confirming knowledge of the regulations available on the drony.gov.pl platform.
- Subcategory A2: Applies to C2 class drones (weighing up to 4kg). In this subcategory, it is forbidden to fly over bystanders. A safe horizontal distance from people must be maintained – at least 30 meters. This distance can be reduced to 5 meters if the aircraft has a low-speed flight mode (the so-called “slow mode”) and it is active. In addition to the A1/A3 training and test, the pilot must undergo practical self-study and pass an additional theoretical exam at an examination center designated by the CAA.
- Subcategory A3: Designed for heavier drones – class C3, C4 (weighing up to 25kg) and for drones without a class (“legacy drones”) weighing from 250g to 25kg. In this subcategory, there is a total ban on flying over bystanders and gatherings of people. Flights must take place at a safe distance from such persons and at least 150 meters horizontally from residential, commercial, industrial or recreational areas. The required competencies are to complete the A1/A3 online training and test.
- SPECIFIC category: Includes operations with a medium level of risk that fall outside the limitations of the Open category. This may concern, for example, flights beyond visual line of sight (BVLOS), flights at altitudes above 120m AGL, flights with drones weighing more than 25 kg, drone dropping operations, or flights near controlled airports. Performing operations in the Special category requires obtaining a permit from the CAA, which is issued on the basis of the Risk Assessment of the Operation (SORA), or operating in accordance with the published standard scenario (national NSTS or European STS), after submitting an appropriate statement by the operator. The operator can also apply for a LUC (Light UAS Operator Certificate), which gives him more autonomy to approve his own operations, which is important in the context of the basics of flying.
- CERTIFIED category: It concerns operations with the highest level of risk, comparable to the risk in manned aviation. These are, for example, flights related to the transport of people (future air taxis), large-scale transport of hazardous materials, or operations over gatherings of people with large drones. In this category, certification of the unmanned aerial vehicle itself, certification of the operator and obtaining a license by the UAV pilot are required.
C0-C6 Drone Classes: What do they mean and what are the requirements from 2024?
From January 1, 2024, all new drones placed on the European Union market must be assigned an identification class (from C0 to C6) along with the appropriate CE marking. The class of a drone determines its technical parameters, equipment with safety systems and the conditions in which it can be used in individual subcategories of the Open category.
- Classes for the Open category (C0-C4):
- C0: Drones with a maximum take-off weight (MTOM) of less than 250g. Designed for flights in subcategory A1. Examples: DJI Mini 2 SE, DJI Mini 3, DJI Mini 3 Pro, DJI Mini 4 Pro, DJI Neo, DJI Flip.
- C1: Drones with an MTOM of less than 900g. Also designed for flights in the A1 subcategory. They must have, m.in, basic functions that make them easier to use. Remote ID system. Examples: DJI Air 3, DJI Mavic 3, DJI Avata 2, DJI Air 2S (after update and class).
- C2: Drones with an MTOM of less than 4kg. They can fly in subcategory A2 (after the pilot meets additional requirements) or A3. They must have Remote ID and a low-speed mode.
- C3: Drones with an MTOM of less than 25 kg. Designed for flights in the A3 subcategory. They must have a Remote ID.
- C4: Drones with an MTOM of less than 25kg, but these are mainly model constructions, without advanced flight automation systems. Designed for flights in the A3 subcategory.
- Classes for the Special Category (C5-C6): Drones of these classes are designed for operations under standard scenarios (STS) in the Special category and must meet more stringent technical requirements.
What about drones that were launched before December 31, 2023 and do not have a class (so-called “legacy drones” or classless drones)?
- Drones with a take-off weight of less than 250g can still fly in the A1 subcategory of the Open category.
- Drones with a take-off weight of 250g to 25kg can only fly in subcategory A3 of the Open category (i.e. away from people and buildings).
Drone liability insurance: Is it mandatory and from when in 2025?
The issue of civil liability insurance (OC) for drone operators has changed significantly with the amendment to the Aviation Law in Poland, which has affected all categories of drones. The obligation to have third-party liability insurance has been introduced for drone operators with a take-off weight of 250 grams to 20 kilograms.
Key information on compulsory third-party liability insurance:
- Effective Date: The provision on mandatory third-party liability insurance for drones in this weight category will come into force on November 13, 2025.
- Scope: Until now, the obligation to have a third-party liability policy applied mainly to drones weighing more than 20 kg or used commercially. The new regulations extend this obligation to a much wider group of popular drones, also used as a hobby.
- Purpose: The main purpose of introducing this obligation is to streamline the process of covering possible damage caused to third parties or their property during drone operations. This obligation applies to both private (recreational) and commercial flights, which is important in the ranking of drones for beginners.
- Penalties for lack of insurance: Failure to provide the required third-party liability insurance after the entry into force of the regulation may result in the imposition of a financial penalty, which may reach up to PLN 4000.
- Policy costs: It is expected that the costs of third-party liability insurance for light drones will vary. Policies for amateur applications can be available from several dozen zlotys per year, while insurance covering the commercial use of a drone can cost from 200 to 800 zlotys per year, depending on the guarantee sum and the scope of coverage.
- Who is covered by the policy: Importantly, the third-party liability policy is assigned to the drone operator, not to a specific device. This means that one insurance can cover flights performed by a given operator with different drones, as long as they fall within the weight range covered by the obligation.
The introduction of mandatory third-party liability insurance for such a wide group of drones is a significant change that aims to increase the responsibility of operators and safety in public space.
Where can you fly a drone? Geographical zones and the DroneRadar/Checkin PansaUTM application.
Before each drone flight, it is absolutely necessary to check the current situation in the airspace and the availability of the area in which we plan to fly. In Poland, this is done using the PansaUTM system, managed by the Polish Air Navigation Services Agency (PANSA), and a dedicated mobile application (previously known as DroneRadar, now it is worth following the official announcements of PANSA/CAA regarding the currently recommended tool), which enables:
- Check active geographic zones: The application visualizes on a map the different types of geographical zones (so-called DRA zones) in which drone flight restrictions or bans may apply. These are, m.in, DRA-R (restricted), DRA-P (prohibited), DRA-T (temporary), DRA-I (informational), DRA-U (U-space for advanced operations).
- Flight registration (check-in): In many cases, especially when flying near airport control zones (CTRs) or other areas with increased air traffic, a formal check-in is required via the app. The PansaUTM system allows for the coordination of unmanned flights with air traffic services.
General rules for flight destinations:
- No Flights: In general, it is forbidden to fly over certain facilities and areas, such as: active airports and their controlled zones (without proper approval and coordination), military facilities, power plants, pipelines, prisons, some national parks (unless the park regulations state otherwise or the consent of the site manager has been obtained).
- Maximum Flight Altitude: In the Open category, as mentioned earlier, the maximum permissible flight altitude is 120 meters above the nearest point of the earth’s surface (AGL).
- VLOS (Visual Line of Sight) principle: The pilot must maintain direct eye contact with his drone throughout the flight, without the help of binoculars or other devices (unless he uses the help of a UAV observer).
Drone regulations, while they may seem complex, are designed to ensure the safety of all airspace users and people and property on the ground. Knowing and following them is crucial for responsible and satisfactory use of the opportunities offered by drones with a camera.
The table below summarizes the key requirements for each flight subcategory in the Open category.
Categories Open Drone Flights in the EU/Poland – Summary of Requirements
| Subcategory | Acceptable Drone Classes | Main Restrictions (flight over people, distance from people/buildings) | Required Pilot Competencies (Training/Exam) |
|---|---|---|---|
| A1 | C0 (<250g), C1 (<900g) | Prohibition of flying into gatherings of people. C0: possible flight over individual bystanders. C1: flight over bystanders only unplanned and short. | Completion of the online training and passing the test on the drony.gov.pl platform (A1/A3 competencies). |
| A2 | C2 (<4kg) | It is forbidden to fly over bystanders. Min. 30m horizontal distance from people (or 5m in low speed mode). | A1/A3 competences + completion of practical self-education + passing an additional theoretical exam at the centre. |
| A3 | C3 (<25kg), C4 (<25kg), classless drones (250g – 25kg) | A total ban on flying over bystanders and gatherings. Flights away from people and buildings (min. 150m from residential, recreational areas, etc.). | Completion of the online training and passing the test on the drony.gov.pl platform (A1/A3 competencies). |
Must-Have Camera Drone Accessories: What Should You Have?
Buying the drone itself is often just the beginning. In order to take full advantage of its potential, ensure comfort of use, safety of equipment and longer and more effective work in the field, it is worth getting a few necessary accessories.
Additional batteries and chargers (hubs): More time in the air, more possibilities.
The flight time on a single battery, even in the case of drones with capacious batteries, is limited and rarely exceeds 30-40 minutes in real conditions. Therefore, having extra batteries is almost a must for anyone who plans longer photo or video sessions, exploration of larger areas, or simply does not want to stop playing after several dozen minutes.
Many manufacturers, including DJI, offer “Fly More Combo” (or similarly named) kits, which typically include two or three additional batteries in addition to the drone itself, as well as a multi-port charging station (aka hub) that is often used in the DJI Fly app for better control of the aircraft. Charging hubs allow you to charge several batteries sequentially (one after the other) or sometimes in parallel, which is much more convenient and saves time compared to charging each battery separately with a standard charger.
It is also important to remember about the proper use and storage of lithium-polymer (LiPo) batteries, which are most commonly used in drones. It is recommended to avoid discharging them completely (to 0%), storing them in a partially charged state (e.g. 40-60%) if they will not be used for a long time, and charging them immediately before the planned flight.
Memory cards for a 4K drone: What capacity and speed to choose? (microSD, V30, U3).
Most drones with a camera save photos and videos on microSD memory cards. Choosing the right card is crucial, especially if you plan to record video in high resolution, such as 4K, or take a series of photos in RAW format, which is important for anyone starting their adventure with drones. A memory card that is too slow can lead to recording problems such as interrupted recording, dropped frames, corrupted files, or even unable to record at the highest quality available.
When choosing a memory card, you should pay attention to two main parameters: capacity and write speed.
- Write Speed: This is the most important parameter for video recording. Card manufacturers use different designations for speed classes:
- UHS Speed Class: The “U” symbol with a number inside. Class U1 (minimum write speed of 10MB/s) is sufficient for Full HD video, but may be too slow for 4K. Class U3 (minimum write speed of 30MB/s) is recommended for smooth 4K video recording.
- Video Speed Class (V): A “V” symbol with a number indicating the minimum write speed in MB/s. Class V10 (10 MB/s) is equivalent to U1. The V30 class (30 MB/s) is a popular standard for 4K recordings and is recommended for most drones with such a camera. The V60 (60 MB/s) and V90 (90 MB/s) classes are designed for more demanding applications, such as recording in 4K at very high frame rates (e.g. 120 FPS) or at 8K resolution.
- For most drones recording in 4K (e.g. at 30/60 FPS), a memory card with a speed class of at least U3 / V30 will be suitable. It’s always a good idea to check the drone manufacturer’s recommendations for compatible cards.
- Card capacity: It depends on individual needs, the length of the planned recording sessions, and the resolution and recording format, which is important when choosing your first drone. 4K recordings, especially RAW photos, take up a lot of space. For comfortable work with 4K materials, it is worth considering cards with a capacity of 64GB, 128GB or 256GB. Some users prefer to have several smaller cards instead of one very large one to minimize the risk of losing all materials in the event of a card failure.
Recommended memory card brands are, m.in, SanDisk (e.g. Extreme series, Extreme Pro series), Samsung (e.g. EVO Plus, PRO Plus series), Kingston (e.g. Canvas Go! Plus), Lexar.
Lens Filters (ND, PL): Better control over exposure and color for professional shots.
For people who want to get more professional-looking and cinematic footage, as well as have more control over exposure and color in photography, screw-on or slide-over filters on the drone’s camera lens can be an essential accessory.
- ND (Neutral Density) filters: Their main task is to reduce the amount of light entering the lens, without changing the color of the image. This allows you to:
- Using slower shutter speeds in movie shooting: This is crucial for achieving a natural motion blur effect, in accordance with the so-called 180-degree rule (the shutter speed should be approximately the inverse of double the frame rate, e.g. for 30 FPS shutter speed approx. 1/60s). On a bright, sunny day, without an ND filter, it would be impossible to get such a slow shutter speed while maintaining the correct exposure.
- Using a wider aperture for bright light photography: If the drone’s camera has an adjustable aperture, the ND filter will allow it to open more (lower f/) aperture, which can give the effect of a shallow depth of field (although it is limited in drones).
- ND filters come in different levels of dimming (e.g., ND4, ND8, ND16, ND32, ND64), where a higher number indicates a stronger darkening.
- PL (polarizing) filters: They work similarly to polarized glasses. Their main task is to reduce glare and reflections from non-metallic surfaces, such as water, glass, wet surfaces. In addition, polarizing filters can increase color saturation (especially sky blues and vegetation greens) and improve the overall contrast of the photo.
ND /PL hybrid filters are also available, which combine the functions of both types of filters. It is important to choose filters that are compatible with your specific drone model and its camera.
Bags, backpacks and landing mats: Safe transport and take-off in all conditions.
- Bags and backpacks: Dedicated transport bags or specialized drone backpacks are extremely useful for safely carrying and storing both the drone itself and all the necessary accessories (controller, batteries, charger, filters, memory cards, etc.). They provide protection against mechanical damage, dust and moisture. Many “Fly More Combos” already include a suitable bag.
- Landing Pads: These are foldable, portable platforms that are unfolded on the ground at the take-off and landing site of the drone. Their use brings several benefits:
- Drone Protection: They protect the delicate parts of the drone (especially the gimbal and camera) from dust, sand, mud, tall grass or snow during take-off and landing.
- Cleanliness is key, especially when using a lightweight and compact drone. They prevent dirt on the camera lens and motors.
- Visibility: They provide a clear, contrasting reference point for Vision Positioning Systems (VPS), which can facilitate precise landings, especially in automatic mode.
- They are especially useful when operating a drone in difficult, uneven or contaminated terrain.
Recommended microSD Memory Cards for 4K Recording Drones
| Recording Resolution / Bitrate (indicative) | Minimum recommended card speed class | Suggested capacity | Examples of recommended card models (brands) |
|---|---|---|---|
| 4K @ 30 FPS (approx. 60-100 Mbps) | U3 / V30 | 64GB – 128GB | SanDisk Extreme, Samsung EVO Plus/PRO Plus, Kingston Canvas Go! Plus, Lexar |
| 4K @ 60 FPS (approx. 100-150 Mbps) | U3/V30 (V60 recommended to be sure) | 128GB – 256GB | SanDisk Extreme Pro, Samsung PRO Plus/Ultimate, Lexar Professional (V60) |
| 4K @ 120 FPS / 5K+ (above 150 Mbps) | V60 / V90 | 256GB – 512GB | SanDisk Extreme Pro (V90), Lexar Professional (V90), Sony Tough (V90) |
Popular Camera Drone Manufacturers: DJI, Autel Robotics, Fimi and Others
There are many manufacturers on the camera drone market, but several of them have gained particular popularity and recognition from users thanks to innovation, quality of workmanship and a wide range of models.
- DJI (Da-Jiang Innovations): The undisputed leader in the consumer and professional drone market. The Chinese company DJI is famous for its technologically advanced and at the same time relatively easy-to-use drones. It offers a very wide range of models, from ultra-light drones from the Mini series (e.g. DJI Mini 4K, DJI Mini 3, DJI Mini 4 Pro), through versatile drones from the Air series (e.g. DJI Air 3), innovative models such as DJI Neo or DJI Flip , to advanced platforms from the Mavic series (e.g. DJI Mavic 3 Pro) and professional drones Inspire or Matrice. DJI drones feature high-quality cameras, advanced stabilization systems, intelligent flight modes, and an extensive ecosystem of accessories and support. There are many authorized DJI dealers and services in Poland.
- Autel Robotics: The second major player on the market, also from China. Autel offers models that compete with DJI, often emphasizing slightly different aspects or offering alternative solutions. Popular series include the EVO Nano (competition for the DJI Mini), the EVO Lite (competition for the DJI Air) and the more advanced EVO II (including the Pro version with a 6K camera, or the Dual version with thermal imaging cameras). Autel drones are valued for their good build quality, robust flight performance, and high-quality cameras, often with large sensors. The availability of spare parts and support in Poland is ensured by distributors.
- Fimi (Xiaomi Ecosystem): A brand that belongs to the Xiaomi ecosystem and is known for offering drones with good value for money. Models such as the Fimi X8 Mini or Fimi X8 SE have gained popularity as more budget alternatives to DJI drones, offering decent specs, including 4K cameras and a foldable design. The availability of parts and support may be a little more limited than with DJI or Autel, but replacement parts are available.
- Other manufacturers: You can also find drones from other brands on the market, such as Hubsan (e.g. Zino Pro ), Potensic (e.g. Atom 4K ), Syma (mainly recreational and beginner drones ), Overmax (e.g. X-Bee Drone 9.5 ), or Parrot (e.g. Anafi). However, it is worth noting that the availability of service and spare parts for less popular brands may be limited. Drones such as BetaFPV or GEPRC , on the other hand, are popular brands in the FPV (First Person View) drone segment, often assembled on their own or in the form of kits.
When choosing a manufacturer, it is worth considering not only the parameters of the drone itself, but also the availability of warranty and post-warranty service, the ease of purchasing spare parts (e.g. propellers, batteries, housing components) and the general technical support offered in a given region. Reputable manufacturers, such as DJI, often offer additional service packages (e.g., DJI Care Refresh) that provide protection against accidental damage and the ability to quickly replace equipment.
How to Consciously Choose a Drone with a Camera?
Choosing the right drone with a camera is a process that requires careful consideration of many factors. There is no one “best” drone for everyone, as the ideal choice depends on your individual needs, expectations, level of experience, and, of course, your budget.
The key takeaways from this guide are:
- Define your goals: Before you start browsing the models, think about what you will mainly use the drone for. Is it supposed to be a tool for professional work, hobby filming, documenting travels, or just for learning and playing? The answer to this question will guide your further search.
- The camera is the heart of a drone, and choosing the right model, such as a small drone, can be crucial for first-time users. If you care about the quality of photos and videos, pay special attention to the parameters of the camera:
- Sensor size: It is fundamental for image quality, especially in difficult lighting conditions and in terms of dynamic range. A larger sensor (e.g. 1-inch) usually means better results.
- Resolution: 4K is becoming the standard, but for some applications, Full HD may be sufficient.
- Stabilization: The 3-axis mechanical gimbal is the best choice for smooth and stable shots.
- Recording formats: RAW for photos (e.g. DNG) gives you the most flexibility in post-production.
- FPS, HDR, ISO: Understanding these parameters will allow you to consciously use the capabilities of the camera.
- Aerial performance: Pay attention to the real flight time (having extra batteries is often a must), range (transmission technology like OcuSync is key here) and wind resistance, especially if you plan to fly in a variety of conditions.
- Smart features and safety: Modern drones offer many modes that automate flight and facilitate the creation of creative shots (e.g. object tracking, Waypoints, QuickShots). Safety systems such as obstacle avoidance sensors and RTH are equally important. However, remember that these are assistance systems and the pilot is always ultimately responsible.
- Laws: Knowing and complying with the regulations for flying drones (operator registration, flight categories, geographical zones, third-party insurance) is absolutely crucial for legal and safe use. The weight of the drone (especially the 250g limit) is important here.
- Budget and accessories: Determine how much you can afford to spend, keeping in mind that price often goes hand in hand with quality and capabilities. Also take into account the cost of necessary accessories, such as extra batteries, a good memory card or filters.
- Manufacturer and Support: Choose drones from reputable manufacturers who provide good technical support, availability of service and spare parts.
Remember that buying a drone is an investment that can provide many unforgettable experiences and open up new creative possibilities. We hope this comprehensive guide will help you make an informed and rewarding decision to enter the fascinating world of aerial photography and filming with the right equipment by your side.